Integrated development and test environment
GitLab is good at source code management, Rainbond is good at application automation management, integrating Gitlab and Rainbond can take advantage of their own strengths, this article describes in detail how to integrate Gitlab and Rainbond, and achieve an integrated development environment through integration.
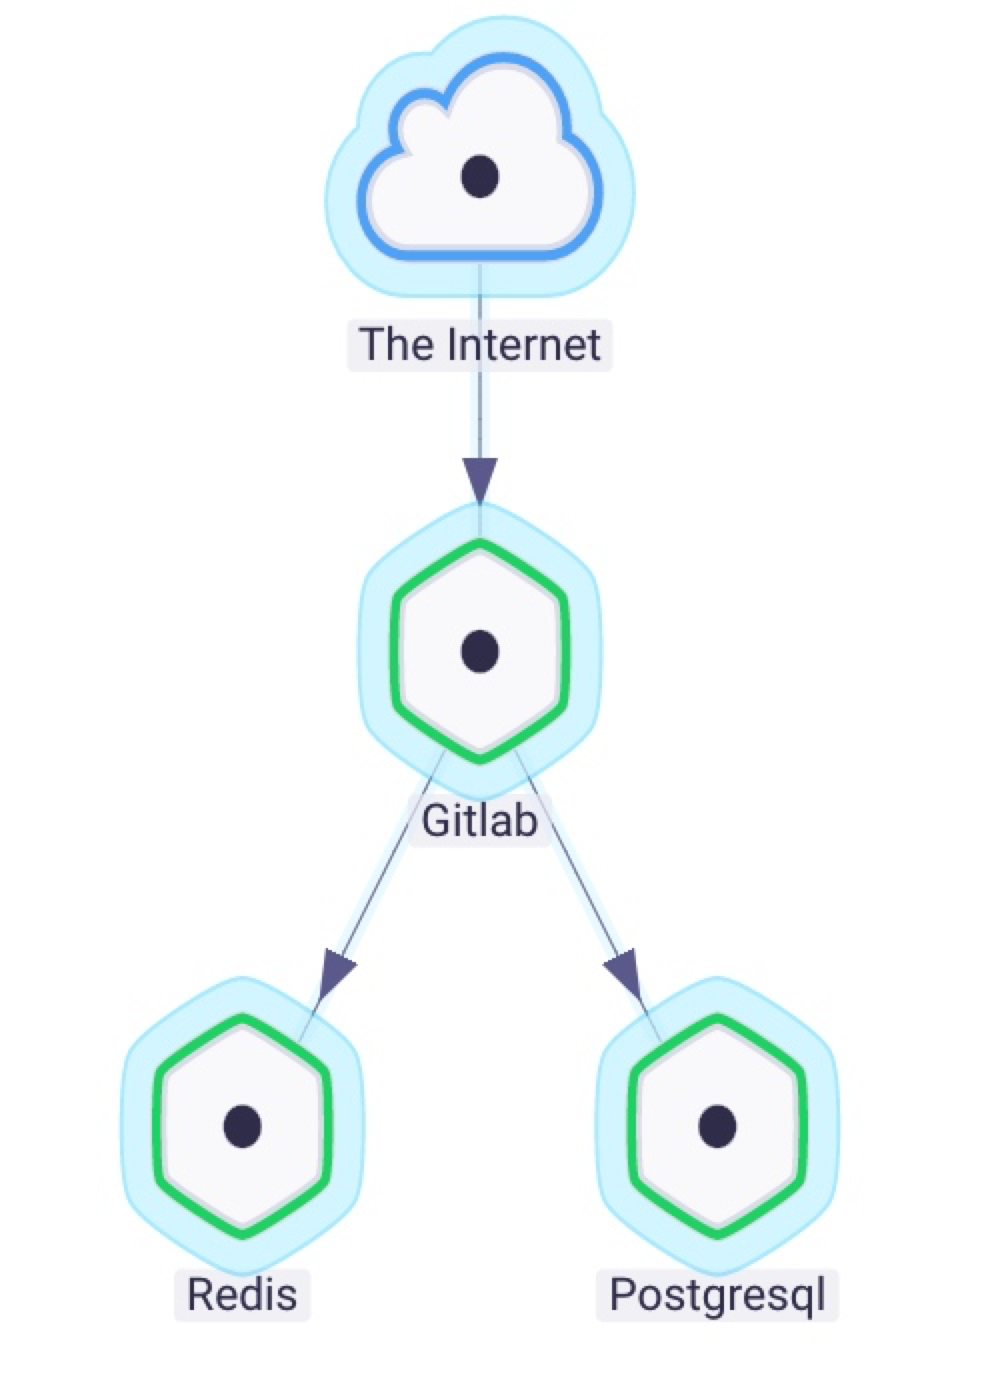
One-click installation of Gitlab via Rainbond
Rainbond is used as an application operating environment, and Gitlab can run on Rainbond. In order to facilitate the installation of Gitlab, we made a Gitlab installation package and put it in the application market of Rainbond to realize one-click installation of Gitlab.
Install Rainbond,install step.
Search "Gitlab" from the application market, click Install, and complete all installation and configuration of Gitlab with one click, including data installation and initialization.

The installation is complete, and Gitlab is managed and maintained through Rainbond.
Rainbond source code construction is connected to Gitlab Oauth to realize one-click code deployment
Friends who have usedRainbondmust know that there are three ways to create components on:: source code creation, image creation, and application market creation.
The source code construction method implements code construction by configuring the source code address. Although Gitlab can provide the source code address, building a new application requires copying the source code address and setting the user name and password. This process is very troublesome and prone to mistakes.
In order to have a better experience with GitLab, Rainbond provides productized support and connects with GitLab through the OAuth2.0 protocol.
Configure GitLab Applications
Go to User Settings → Applications
| option name | Fill in the content | illustrate |
|---|---|---|
| Name | Rainbond | Fill in the custom Application name |
| Redirect URI | https://IP:7070/console/oauth/redirect | The jumpback path, used to receive the credentials returned by the third-party platform |
| Scopes | api, read_user, read_repository | GitLab permission settings, you need to open api, read_user, read_repository |
Please save the Application ID and Secret after creation, which will be used later.
When deploying Rainbond using privatization, you need to configure GItLab to allow sending webhook requests to the local network
Go to Admin area → settings → NetWork → Outbound requests
Check the Allow requests to the local network from hooks and services option
Configure Rainbond OAuth
Enter Rainbond Homepage Enterprise View → Settings → Oauth Third-Party Service Integration → Open and View Configuration → Add
| option name | Fill in the content | illustrate |
|---|---|---|
| OAuth type | gitlab | Oauth type for authentication |
| OAuth name | Custom (GitLab-Demo) | Fill in the custom Oauth service name |
| service address | http://xx.gitlab.com | GitLab service access address |
| Client ID | Application ID obtained in the previous step | Application ID generated by GitLab |
| client secret | Application Secret obtained in the previous step | Application Secret generated by GitLab |
| Platform access domain name | Use default fill | The access address used for the bounce back after OAuth authentication |
Rainbond OAuth Authentication
Enter Rainbond Homepage Enterprise View → Personal Center → OAuth Account Binding → Corresponding Account → Go to Authentication
After docking effect
Next, the renderings of the platform after Rainbond and Gitlab are docked are shown.
When we connect successfully, entering the page built based on source code will display the effect in the figure below, showing all the warehouse lists.
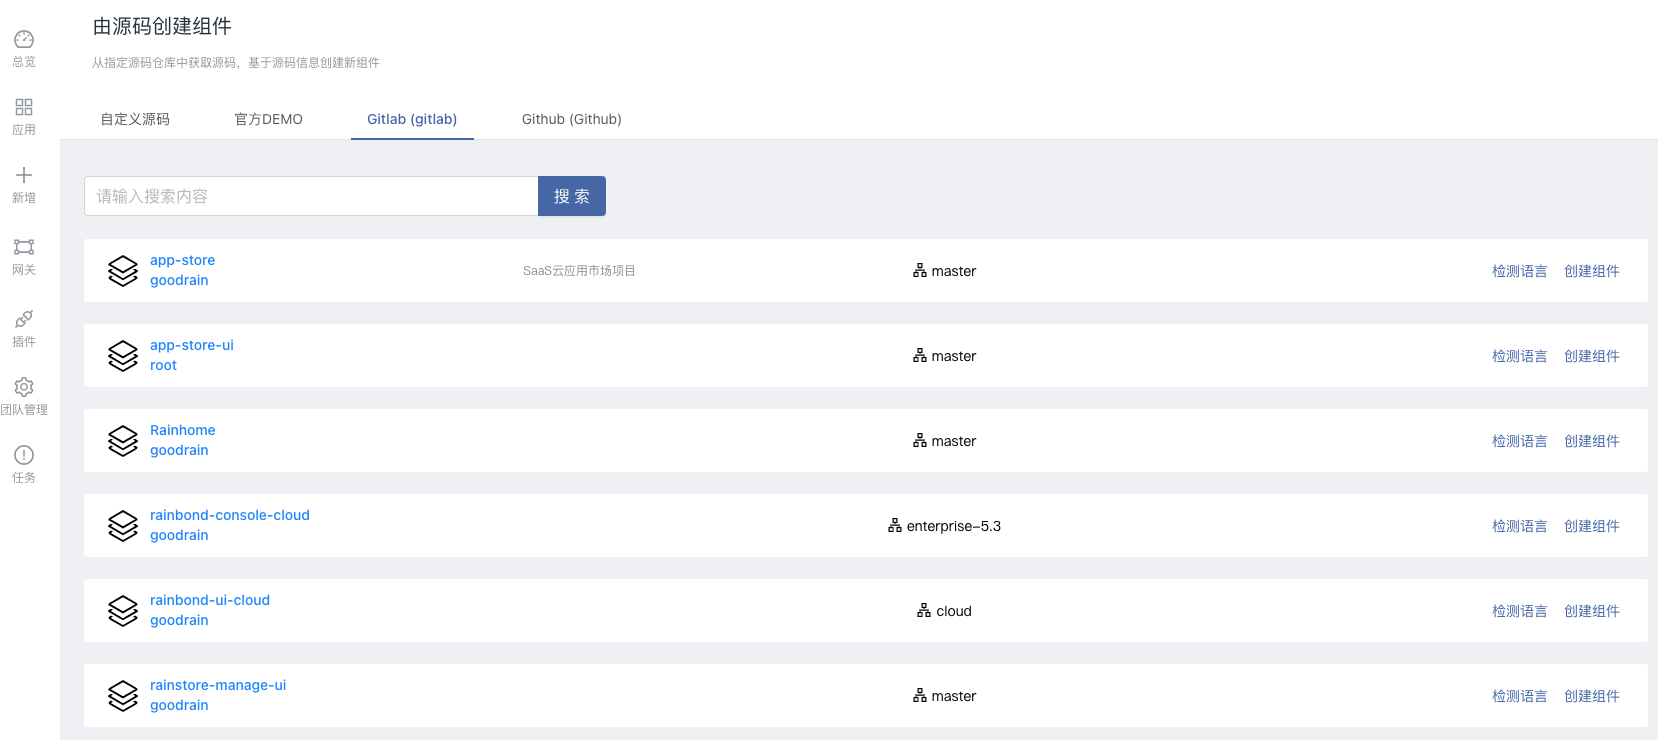
After connecting with GitLab through Rainbond OAuth2, when logging into different accounts on the Rainbond platform, you need to enter the personal center for authentication. After authentication, Rainbond will display different code repositories according to the different permissions of the account.
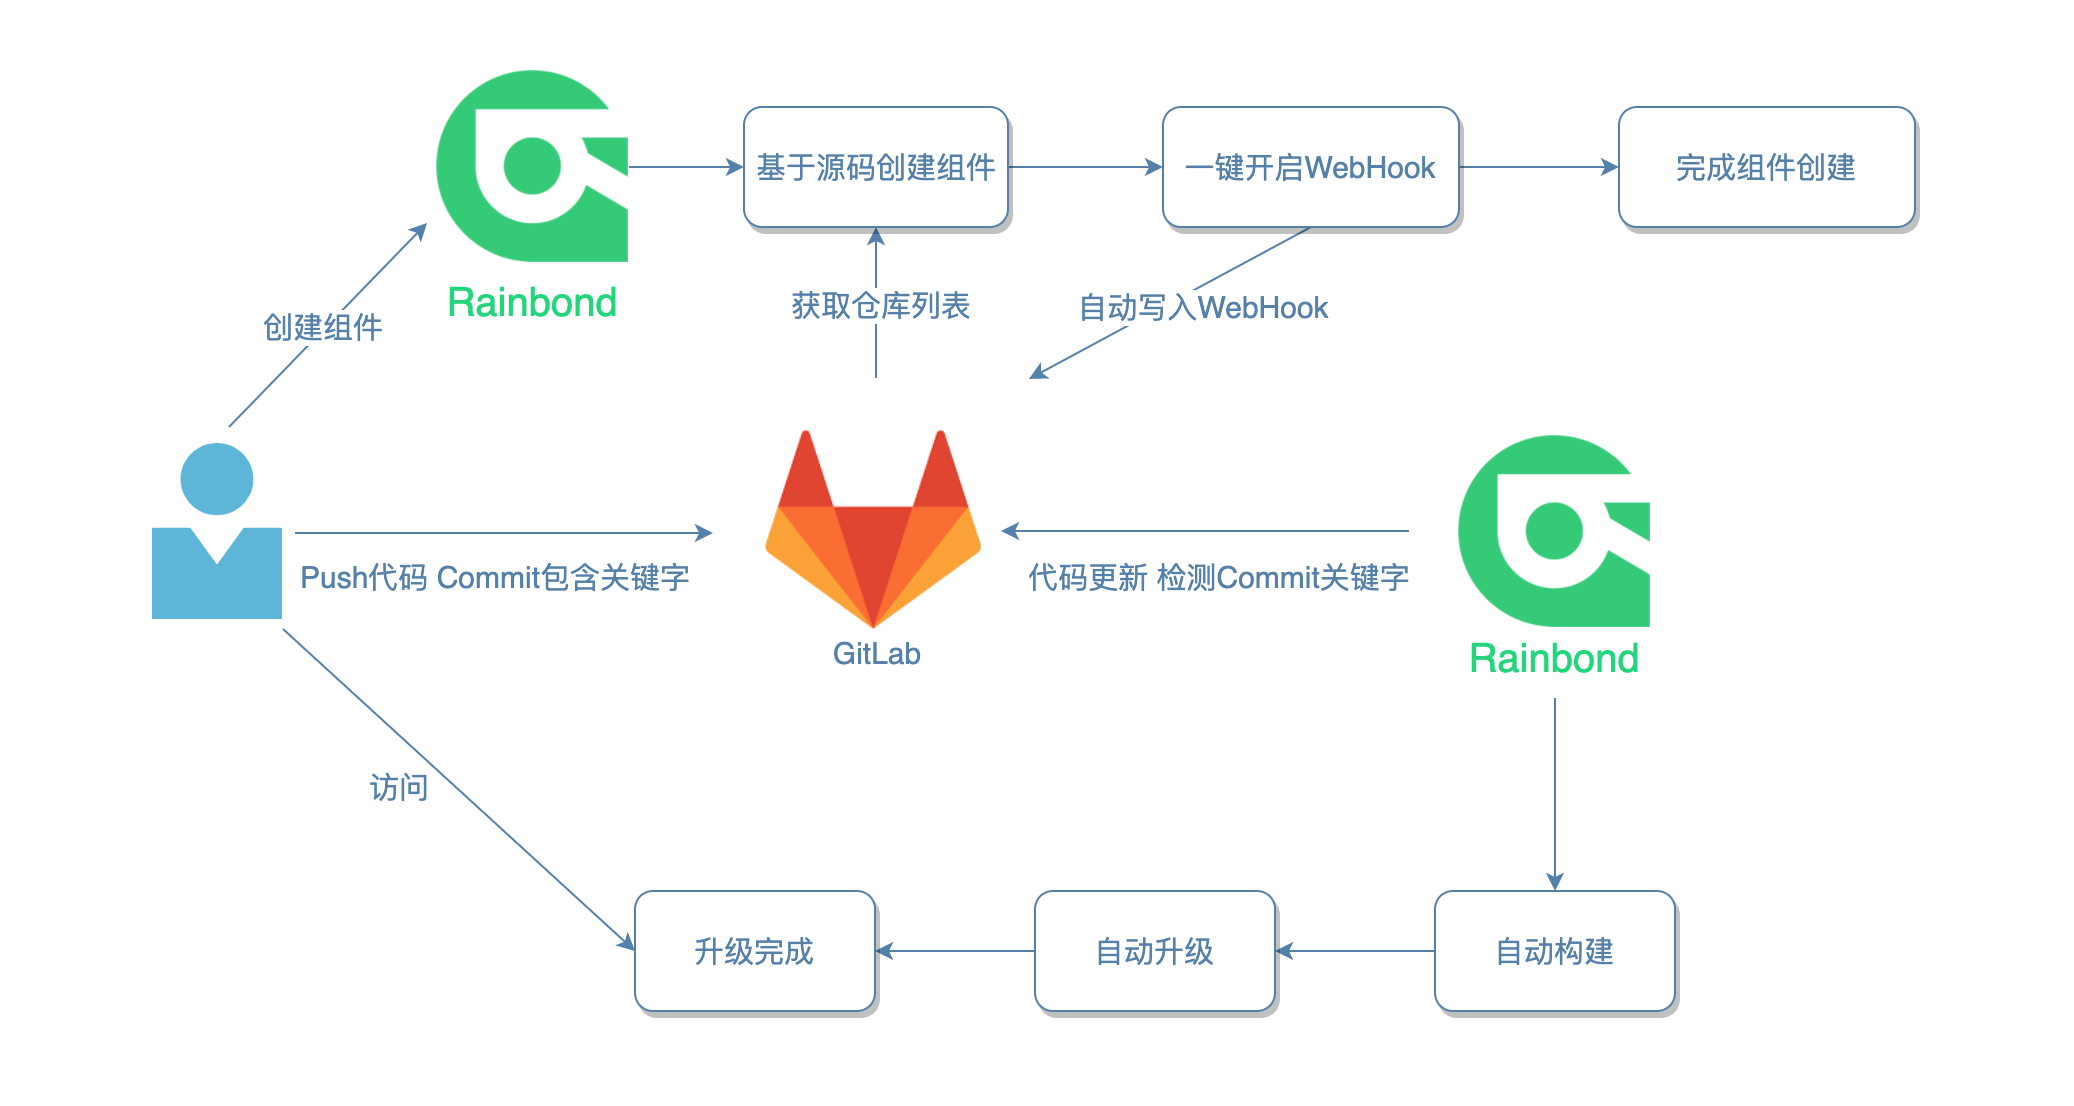
Rainbond docks with Gitlab WebHook to automatically trigger builds
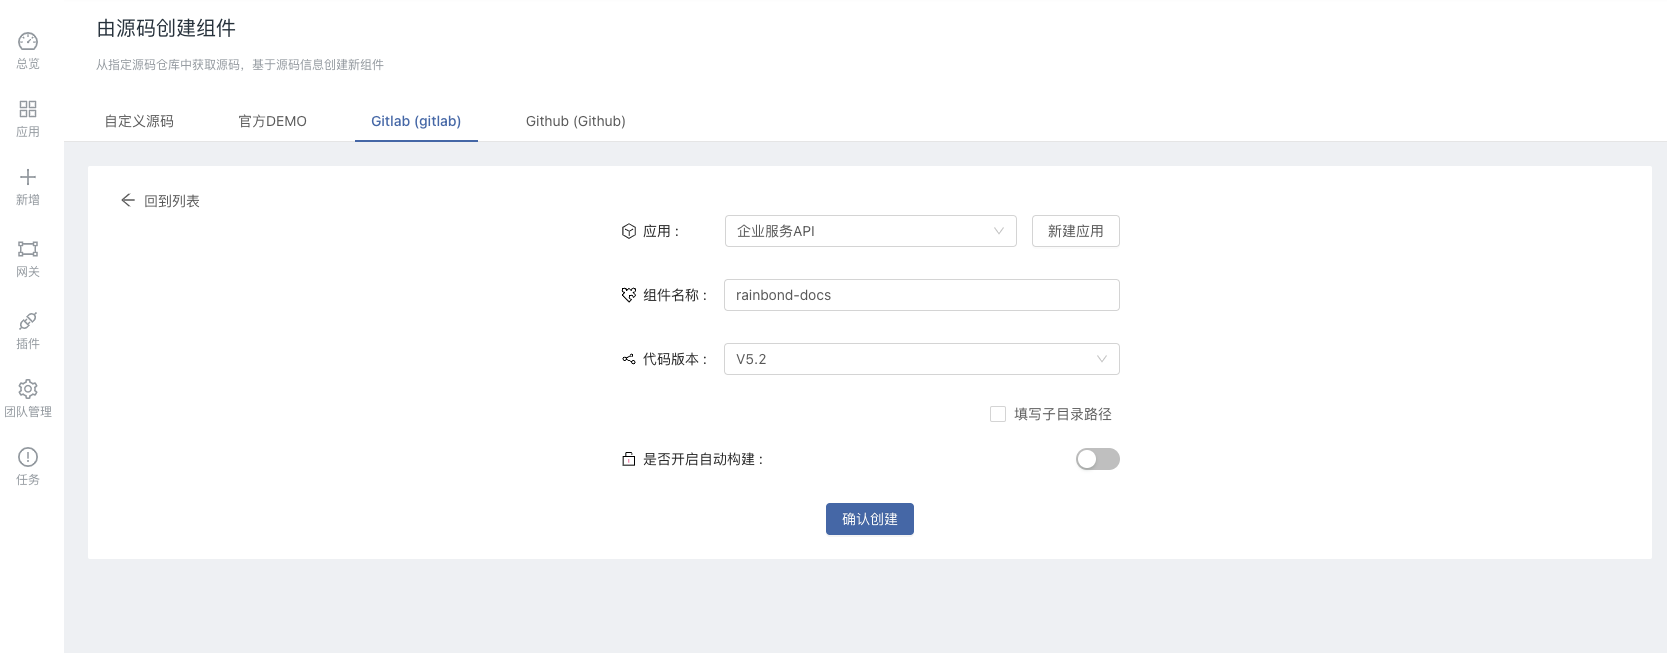
When we complete the integration of Rainbond and Gitlab Oauth, select the specified repository, click Create Component, select the code version (automatically obtain code branches and tags) and enable automatic build.
After the creation is complete, configure the WebHook to automatically build in the component, submit the code, and the Commit information contains the "@deploy" keyword to trigger the WebHook to automatically build.
Commit information keyword triggering GitLab WebHook is not natively supported. Before that, some community users proposed that when submitting code to trigger the build, every submission would trigger the build. The user did not want to do this, so the Rainbond R&D team developed a Commit based on the submitted code. Messages contain keywords to trigger automatic builds.
The following diagram shows the user's entire flow from component creation to continuous development.
Summarize
Capability of an integrated development environment:
- Code management:All management functions related to code, providing management of web interface (Gitlab)
- wiki :Online editing of documents, providing version management functions (Gitlab)
- Issue Management:Issue Management (Gitlab)
- Continuous integration:code automatically compile and build (Rainbond)
- Environment management:Quickly build a development or testing environment to ensure the consistency of development, testing, and production environments (Rainbond)
- Architecture Orchestration:Non-intrusive Service Mesh Architecture Orchestration (Rainbond)
- Module reuse:realizes the accumulation and reuse of the company's internal modules, applications, and services through the component library, and at the same time realizes software asset management (Rainbond)
- Continuous delivery:development, testing, production environment continuous delivery process (Rainbond)
- Application management:application monitoring and operation and maintenance panel (Rainbond)
- Team management: team management, member, role management (Rainbond)
The value of an integrated development:
- out of the box
- Let the development team focus on writing business code and don't waste time on the environment.
- Application granular abstraction, easy to use, and quick to use.
- Process automation to improve operational efficiency (continuous integration, environmental management, continuous delivery, etc.).