Quickly deploy source code and MySQL
This tutorial will demonstrate some of the core capabilities of Rainbond:
- Source Code Build: Automatically recognize Java Maven language, complete automated deployment from source code to operation.
- Application Market Ecosystem: One-click installation of standardized middleware to achieve production-level availability.
- Component Assembly: Visually establish service dependencies, automatically inject environment variables and connection information.
Prerequisites
- Completed Rainbond Quick Installation.
1. Deploy Java Maven Service via Source Code
🚀 Highlights
- Zero Configuration Build: Automatically recognize
pom.xmlfile, complete the entire process from dependency download->compile and package->containerized build - Multi-Environment Adaptation: Automatically detect ARM/x86 architecture, match the corresponding base image
🧩 Operation Process
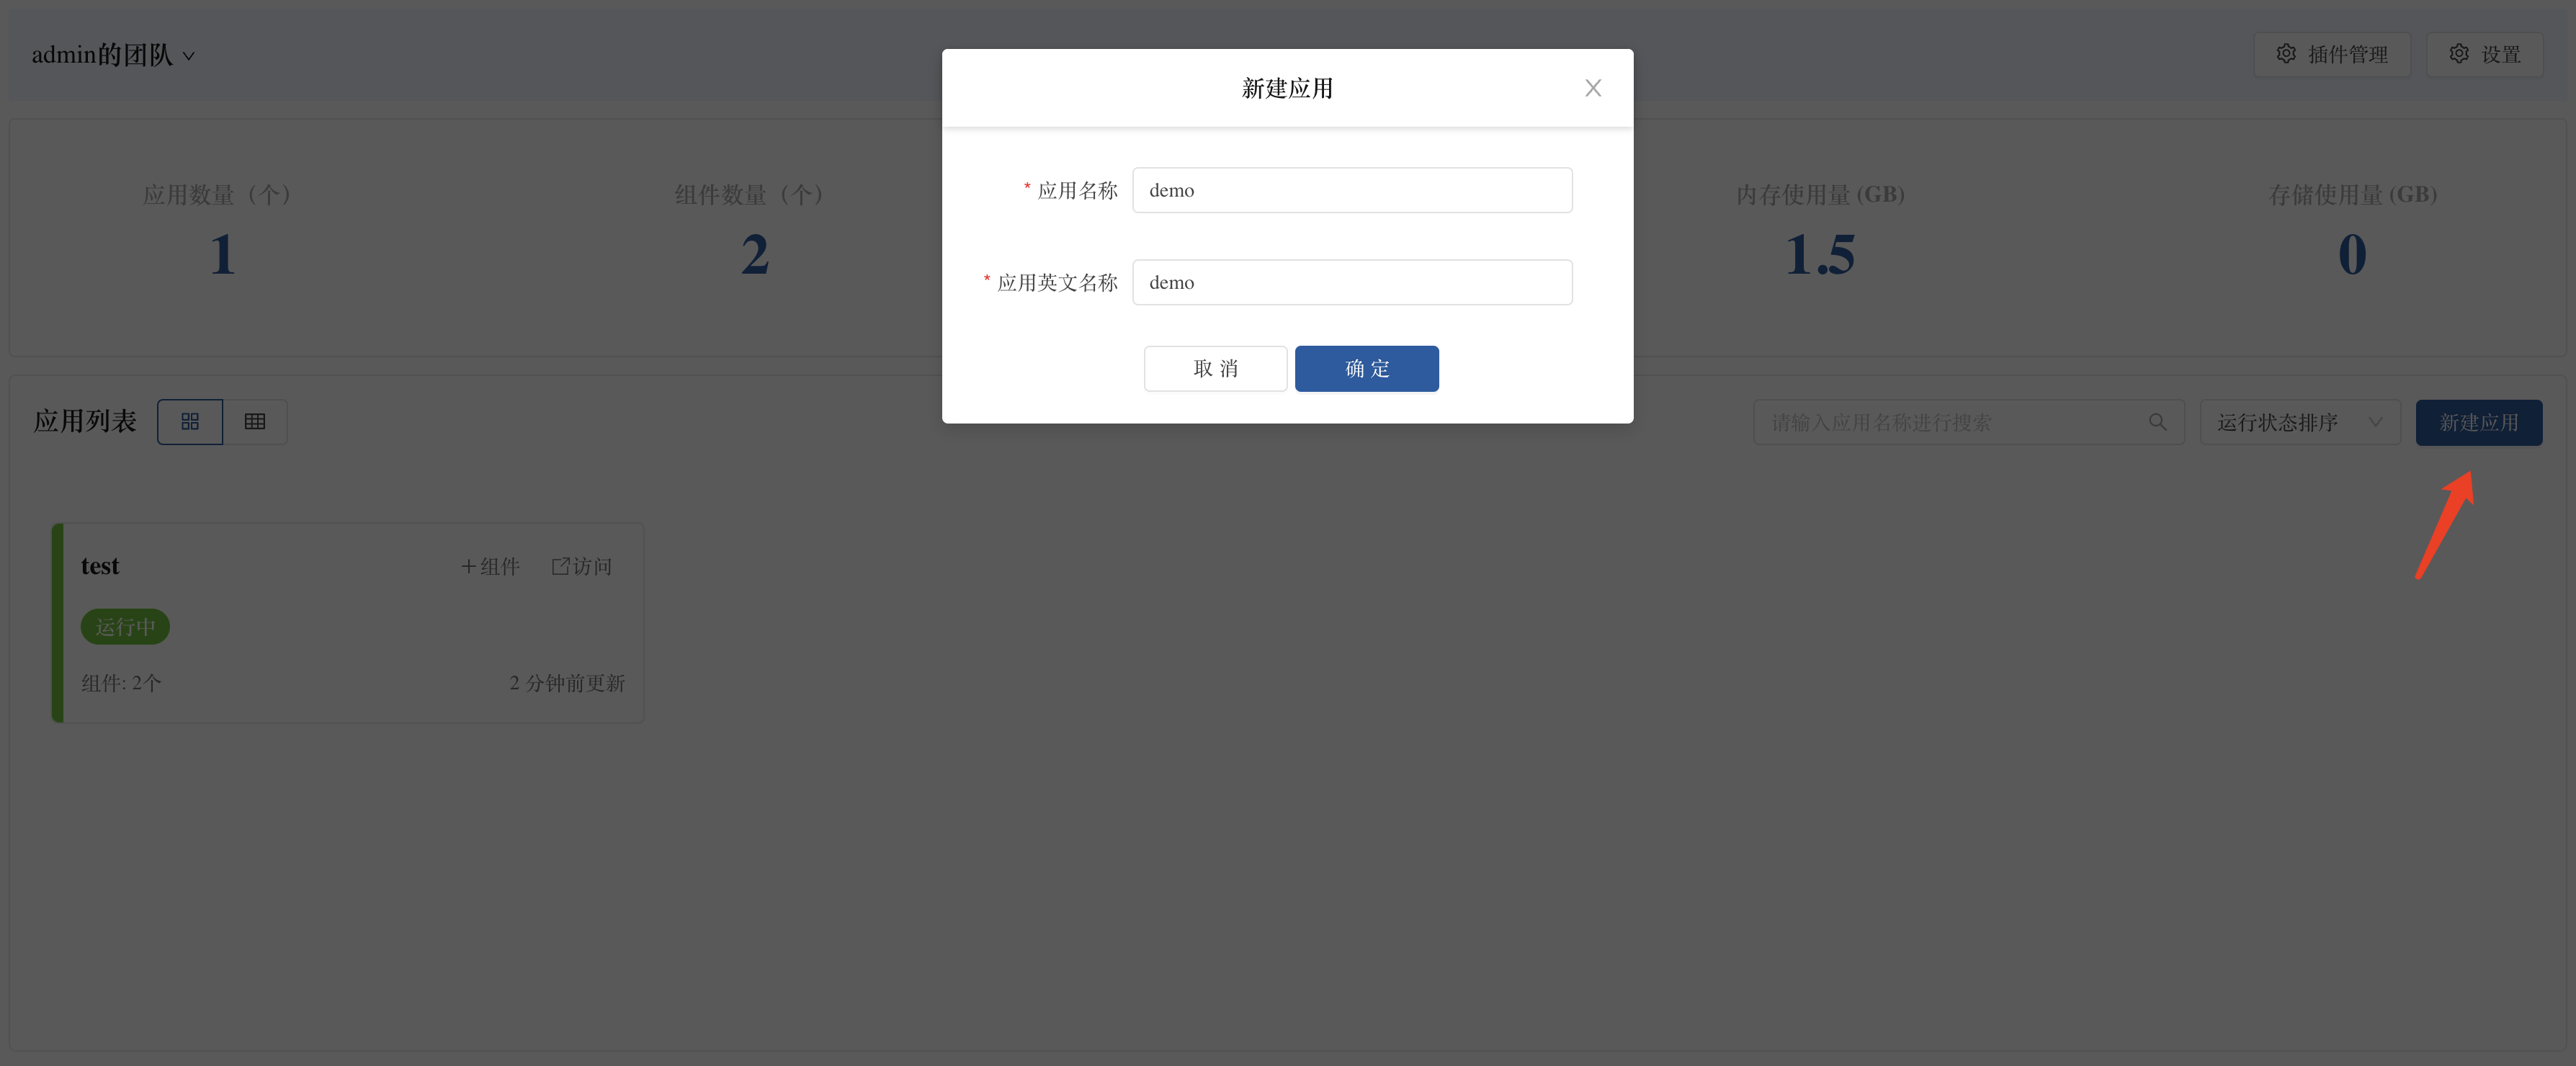
- Create Application and Component
- Enter the target team view ➡️ Create a new application.
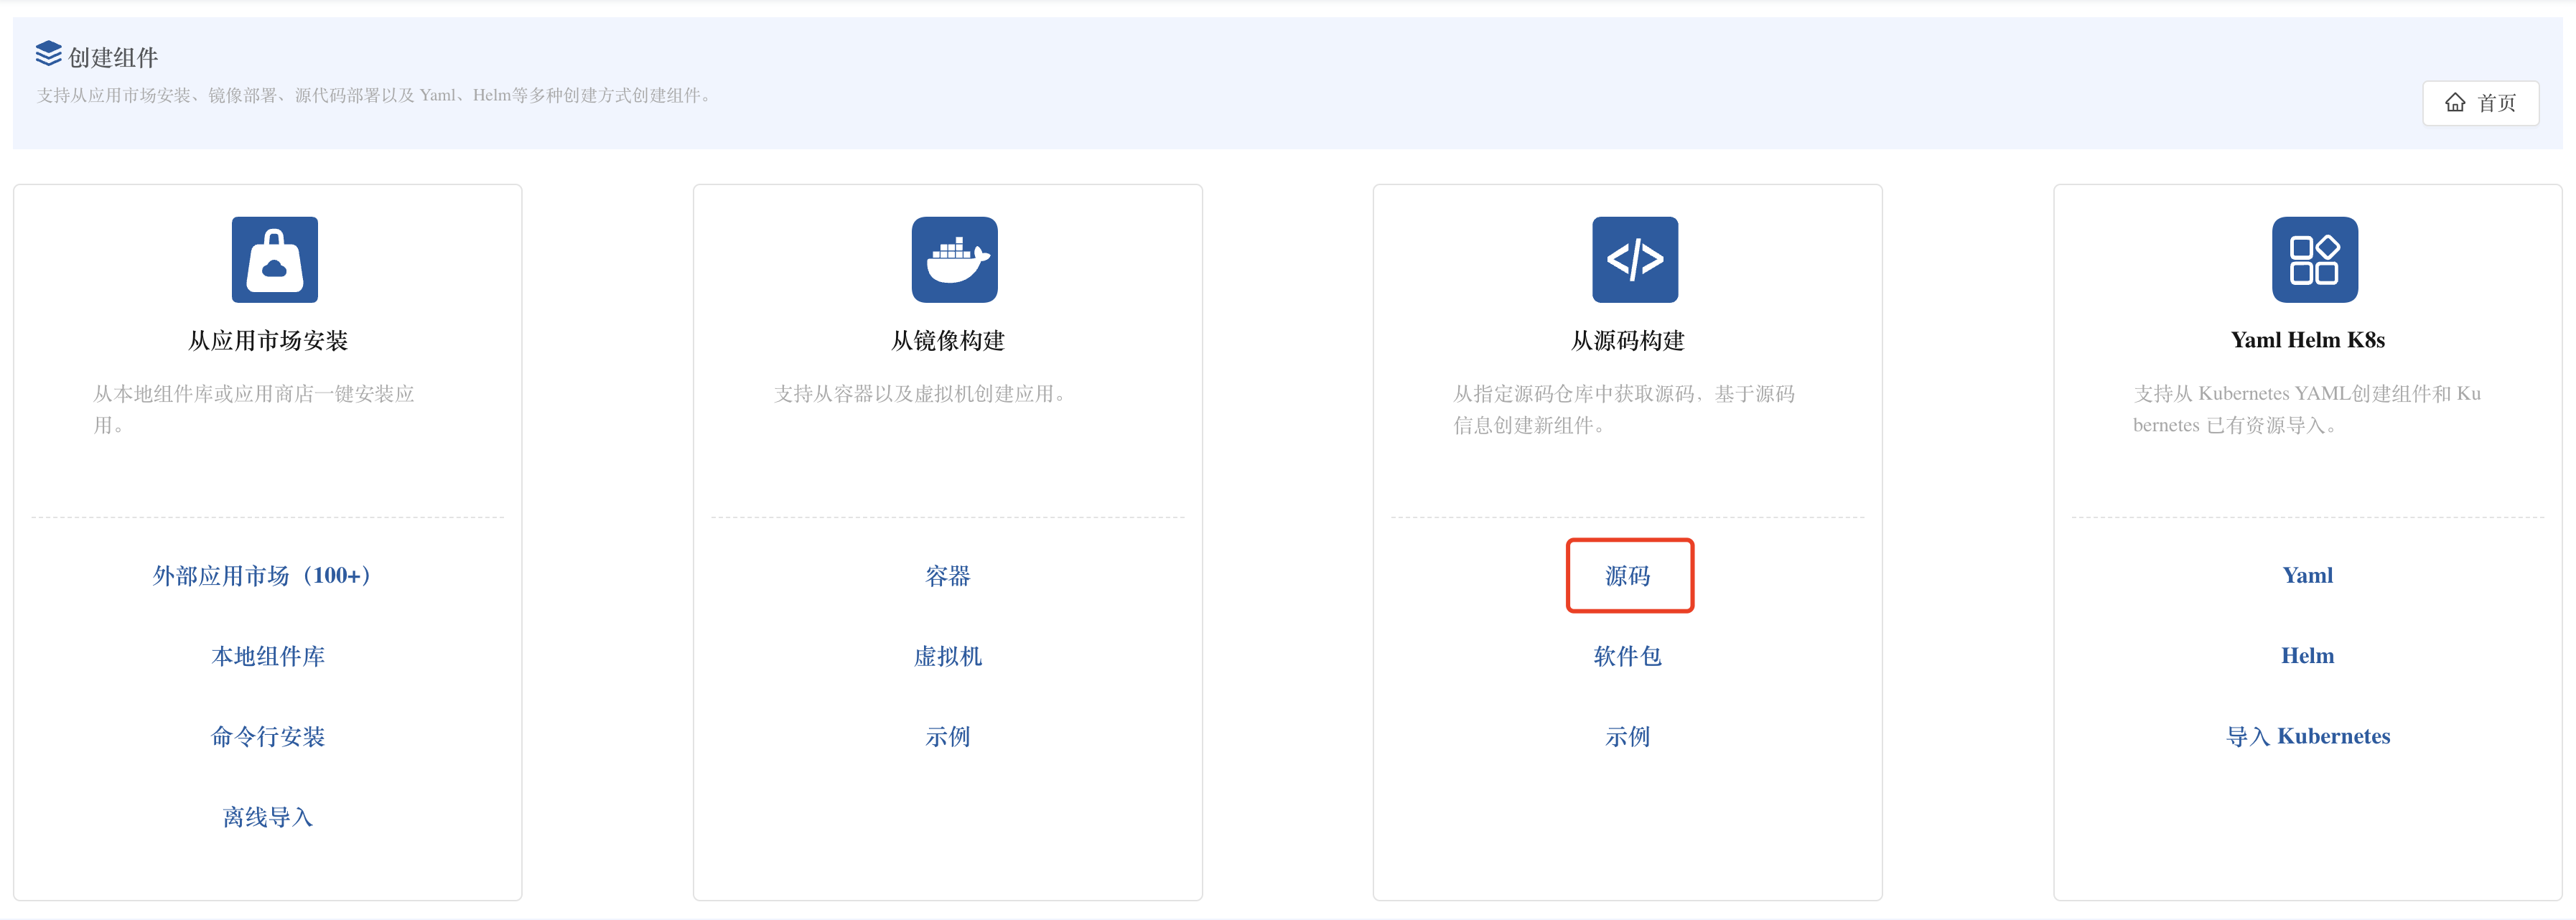
- Select to build from source code ➡️ Source code.
- Customize the application name.
- Repository address:
https://gitee.com/rainbond/java-maven-demo.git. - Branch:
master.
- Intelligent Parsing Process
- Automatically parse the corresponding language type based on the project files, such as if there is a
pom.xmlfile in the project, automatically determine it asJava-Maven. - Automatically parse the Maven build command based on the
pom.xmlfile.
- Automatically parse the corresponding language type based on the project files, such as if there is a
- Deployment Monitoring
- View real-time logs of source code build in the component's overview ➡️ Operation records. builder: [INFO] BUILD SUCCESS # Source code compilation completed pushing manifest for goodrain.me/xxx done # Image build completed
- Verify running status (green)
- Access Verification
- Automatically generate access domain name rules,
<componentID>-<port>-<NS>-<cluster root domain>, such as:gr6f8fd7-5000-default-192.168.1.11.nip.io. - Component ➡️ Port view, use the automatically generated domain name to access the sample page.
- Automatically generate access domain name rules,

2. Install MySQL Service via Application Market
🚀 Highlights
- Out-of-the-Box Use: Pre-configured resource limits, persistent storage, health checks, and other production-level parameters.
- Localization Adaptation: Automatically select the MySQL image that matches the current cluster architecture (ARM/x86).
🧩 Operation Process
- Install Middleware
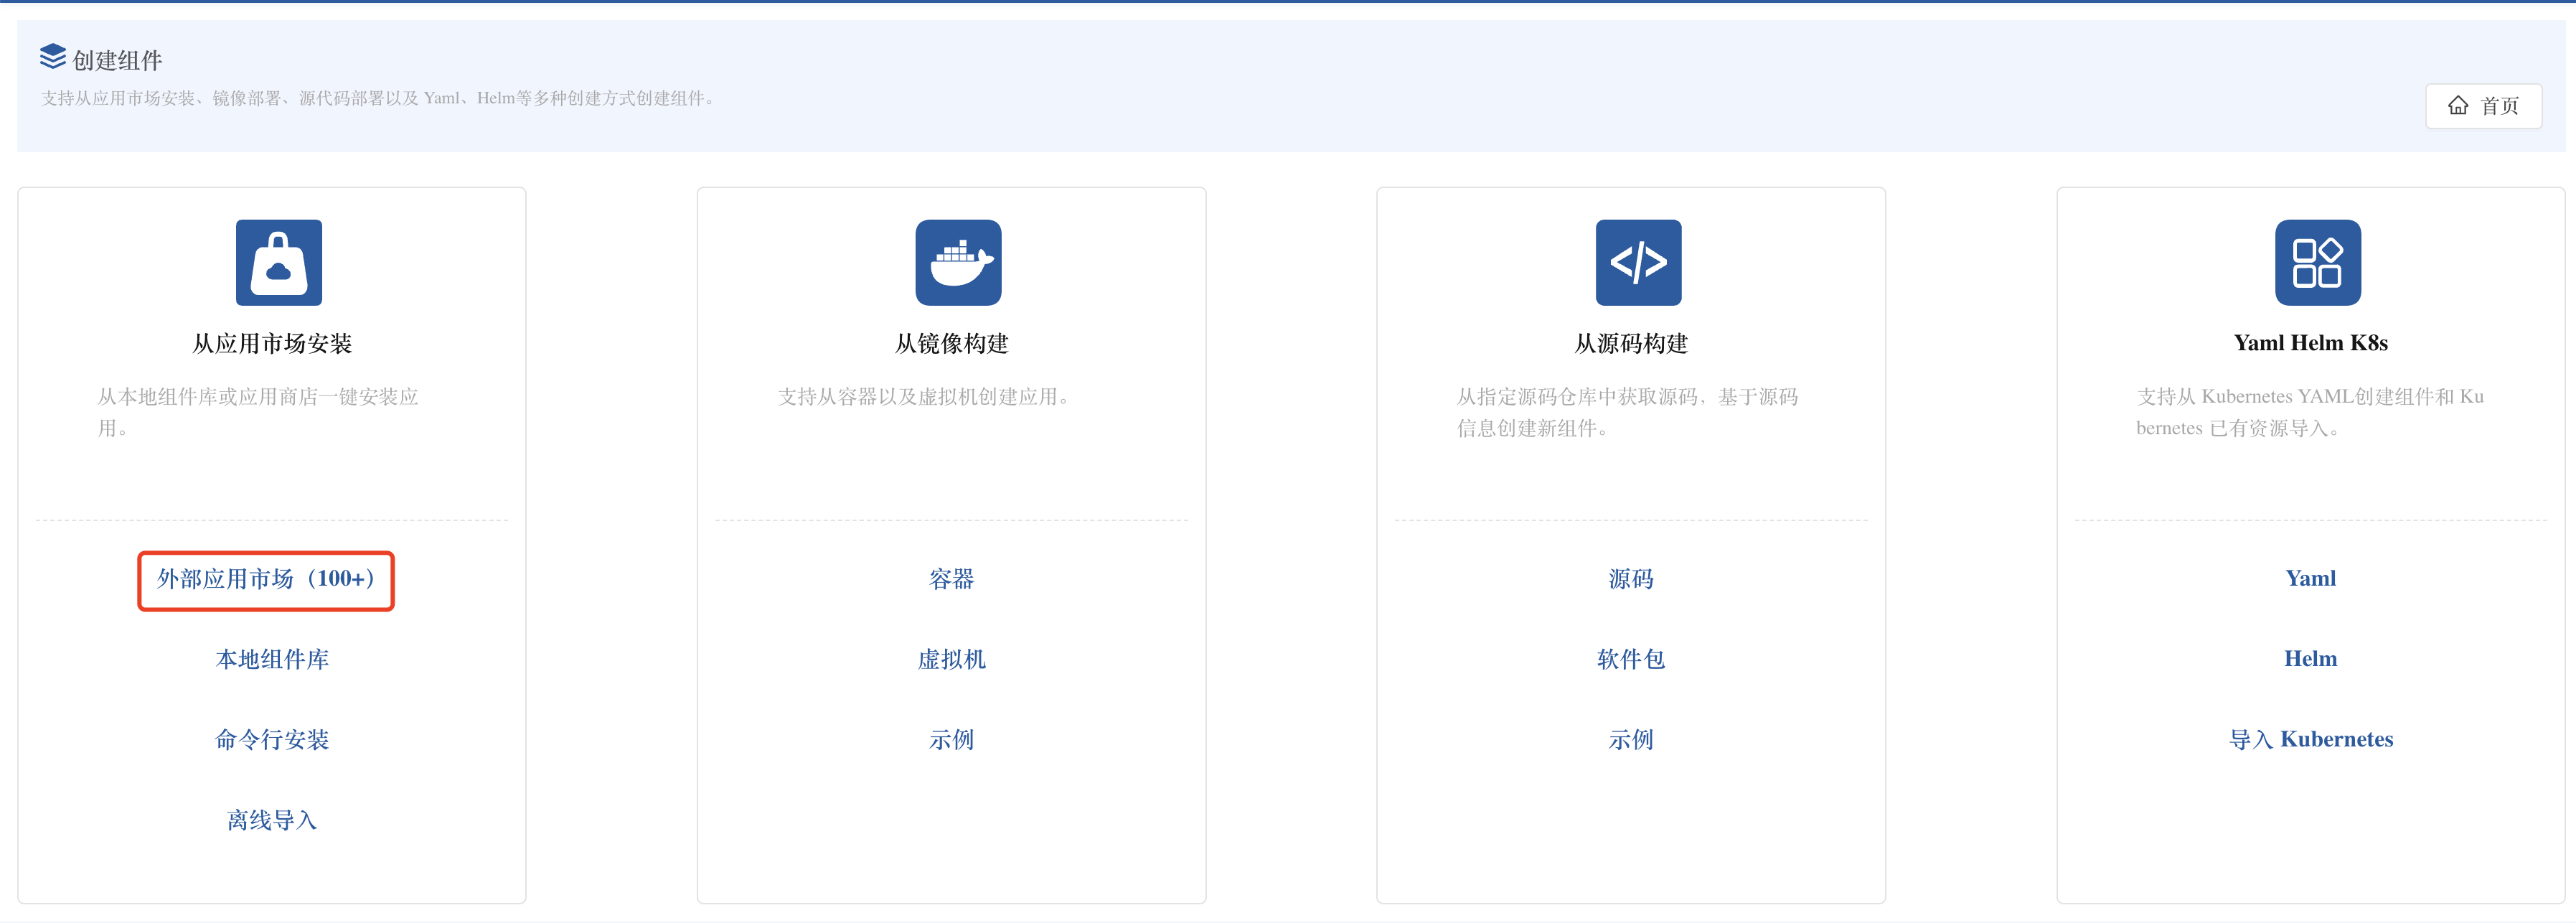
- Add component ➡️ Select external application market.
- Search for MySQL and install version 8.0.

- Intelligent Configuration Instructions
- Automatically create PVC and mount it to
/var/lib/mysql. - Automatically generate root password and store it in component connection information.
- Automatically create PVC and mount it to
- Status Check
- If the component status is green, it means the deployment is successful.
- Access Management
- Component ➡️ Port view, enable the external service switch.
- Automatically generate access policies, click to view MySQL connection information, such as address, account password, etc.
3) Establish Communication Between Services
🚀 Highlights
- Automatic Injection of Environment Variables: Dynamically inject environment variables to achieve dynamic resolution between services.
- Inter-Service Communication: Automatically create internal service domain names to achieve internal service access using domain names.
🧩 Operation Process
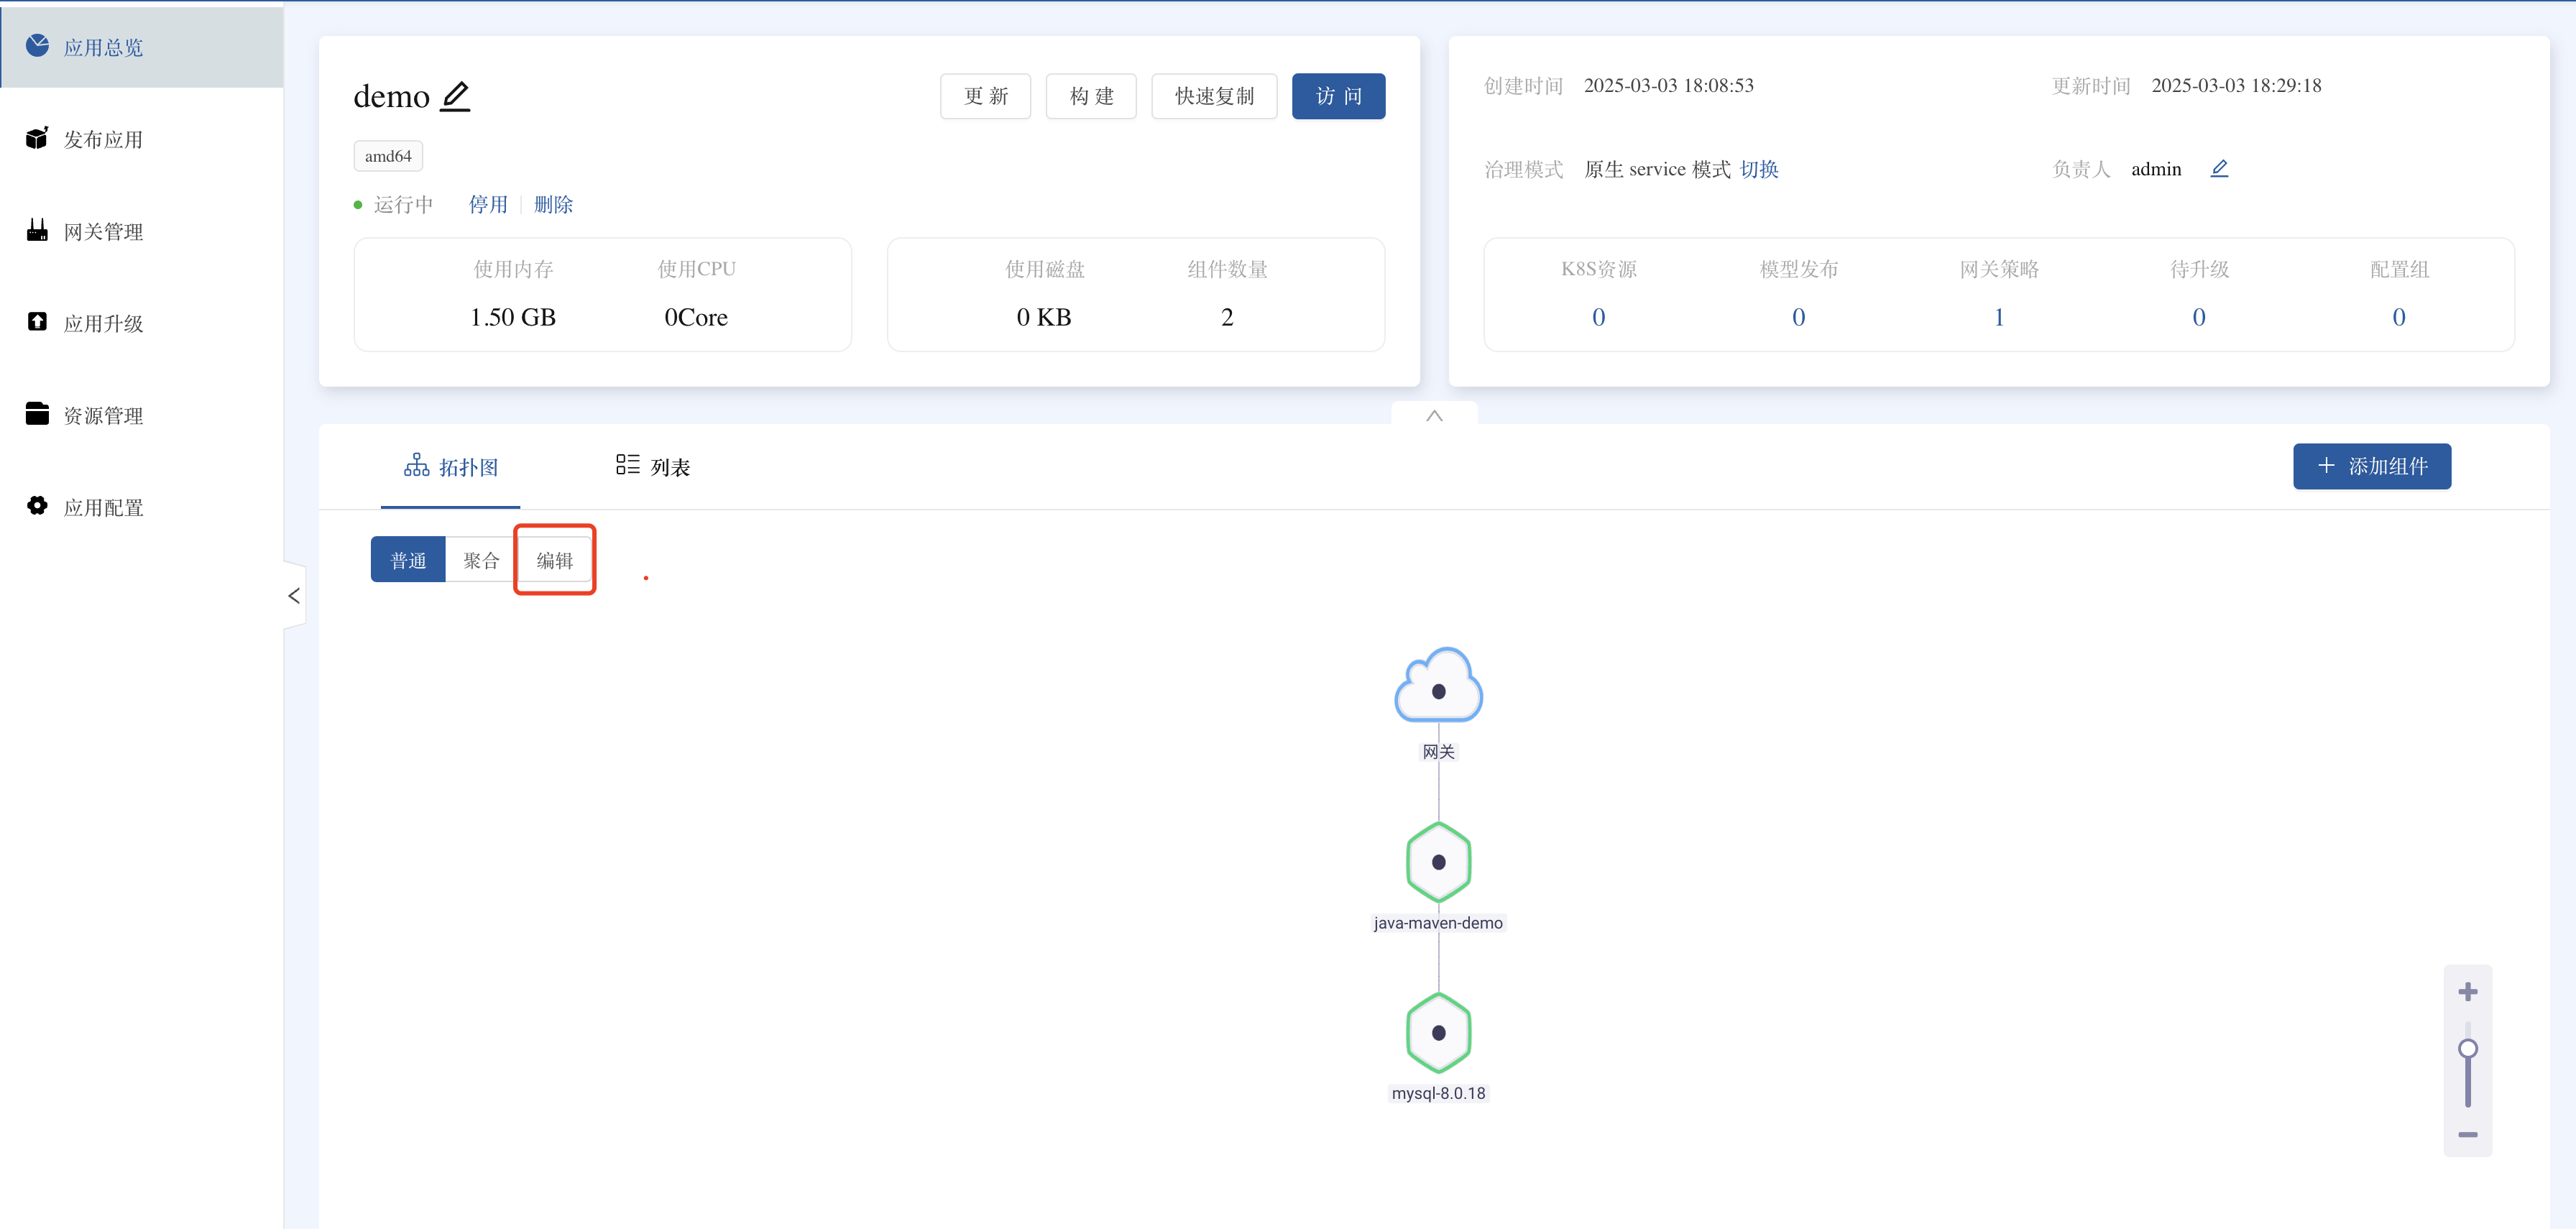
- Topology Diagram Editing
- Enter the application view ➡️ Topology diagram editing mode.
- Drag Java Maven ➡️ MySQL to establish a connection.
- Dependency Effect Verification (Command Line)
- Enter the
Javacomponent's web terminal, execute:
    env | grep MYSQL_HOST
curl ${MYSQL_HOST}:${MYSQL_PORT} - Enter the
- Dependency Effect Verification (Browser)
- Access the Java service instance page, and enter the MySQL example page.
- Confirm the display of MySQL connection information and database tables, etc.
info
After establishing the dependency relationship between services, restart the dependent component to ensure the environment variables are correctly injected.