Participate in community contribution:share your plugin
article introduces how to share your plugins to the Rainbond open source app store, sharing the extension capabilities of plugins and enriching the plugin market with the Rainbond community.

Since the implementation of application operation and maintenance features has great commonality, in order to decouple the business container from its operation and maintenance capabilities, Rainbond implements a plug-in mechanism under components based on the SideCar mode.The Rainbond plug-in can be used as an extension of component operation and maintenance capabilities. The plug-in itself is a sidecar container, which can be used to solve the following problems:
- Extend the functionality of components without changing existing business code
- Complete some data initialization operations before the business runs
- Send business logs to external servers for analysis and processing
- Intercept the traffic of cleaning business and use it as a firewall
- Monitor business performance indicators, etc.
The plugin itself contains only the description and implementation, making it reusable.Must be bound to a component to have runtime state.In the V5.7.0-release version, Rainbond supports users to share their own plug-ins to the open source application store, and other users can use the plug-ins.
Plug-in principle
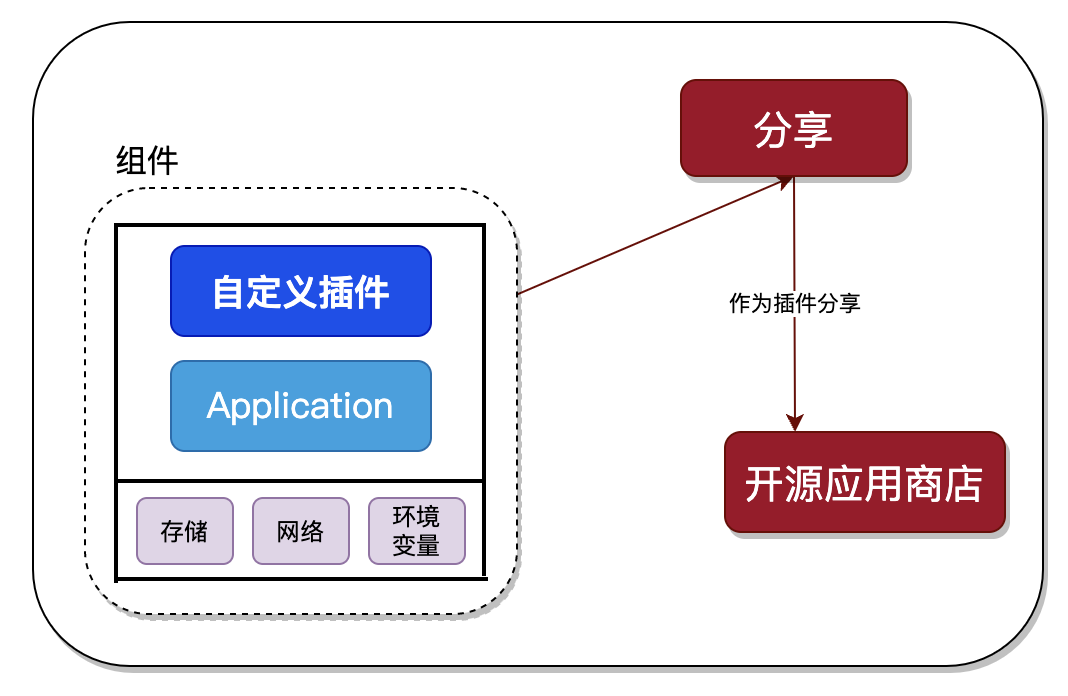
As shown in the figure above, the:plugin has the following features0
- Share the network with the application, and the network space is consistent, so that the plug-in can bypass and truncate the component network traffic, set the component local domain name resolution, etc.
- Shared storage with applications, and file exchange between plugins and components can be done through persistent directories
- Share environment variables with applications, and plugins can share configuration information by reading the environment variables of components
Based on the above features, we can make our own plug-ins and share them with the components in the open source application store for everyone to use.
Plugin production
Next, we will take the Fluentd-ElasticSearch6 plug-in as an example to introduce how to make the plug-in.
Make Fluentd ElasticSearch 6 plugin
- Go to Rainbond Team View -> Plugins -> New Plugin, create a general type of plugin.
- Mirror address:qlucky/fluentd-elasticsearch6:v1.14
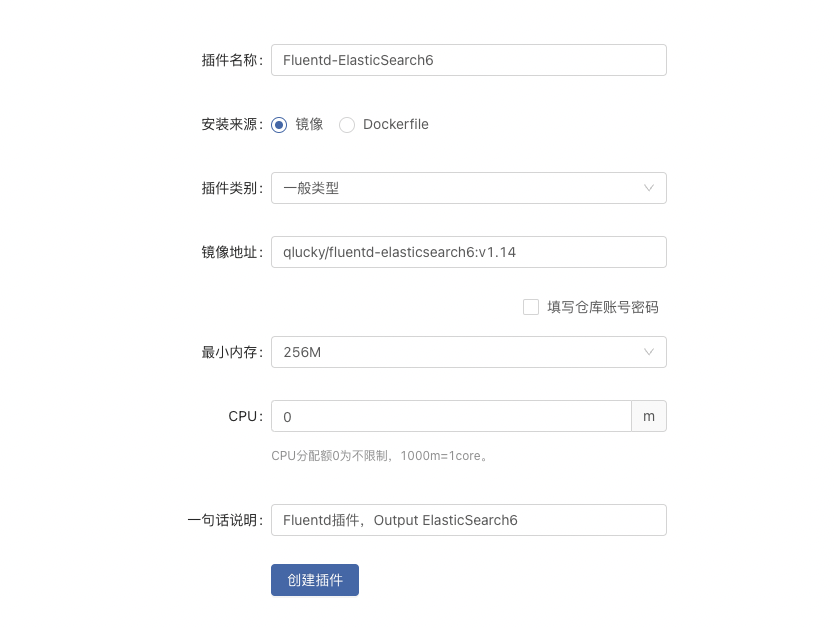
- Create a plugin and click Build in the upper right corner to build the plugin.
- Add a configuration file to the Fluentd plugin, and add a new configuration in
configuration file and shared storageunder the plugin.- Configuration file mount path:/fluentd/etc/fluent.conf
<source>
  @type tail
  path /var/log/nginx/access.log
  pos_file /var/log/nginx/nginx.access.log.pos
  <parse>
    @type nginx
  </parse>
  tag es.nginx.log
</source>
<match es.nginx.**>
  @type elasticsearch
  log_level info
  hosts 127.0.0.1
  port 9200
  user elastic
  password MagicWord
  index_name fluentd.${tag}
  <buffer>
    chunk_limit_size 2M
    queue_limit_length 32
    flush_interval 5s
    retry_max_times</match>
  </buffer>

Use Fluentd plugin
- Create a component based on an image, the image uses
nginx:latest, and the mount storage isvar/log/nginx.- After the storage is mounted in the component, the plugin will also mount the storage by itself, and can collect the logs generated by Nginx.
- In the Nginx component -> plug-in -> is not activated, open the Fluentd plug-in, and update/restart the component to take effect.
- Based on open source app store installation
Elasticsearch 6.2.4 - Add dependencies, Nginx (plug-in has been activated) depends on Elasticsearch, update/restart Nginx components to make the dependencies take effect.
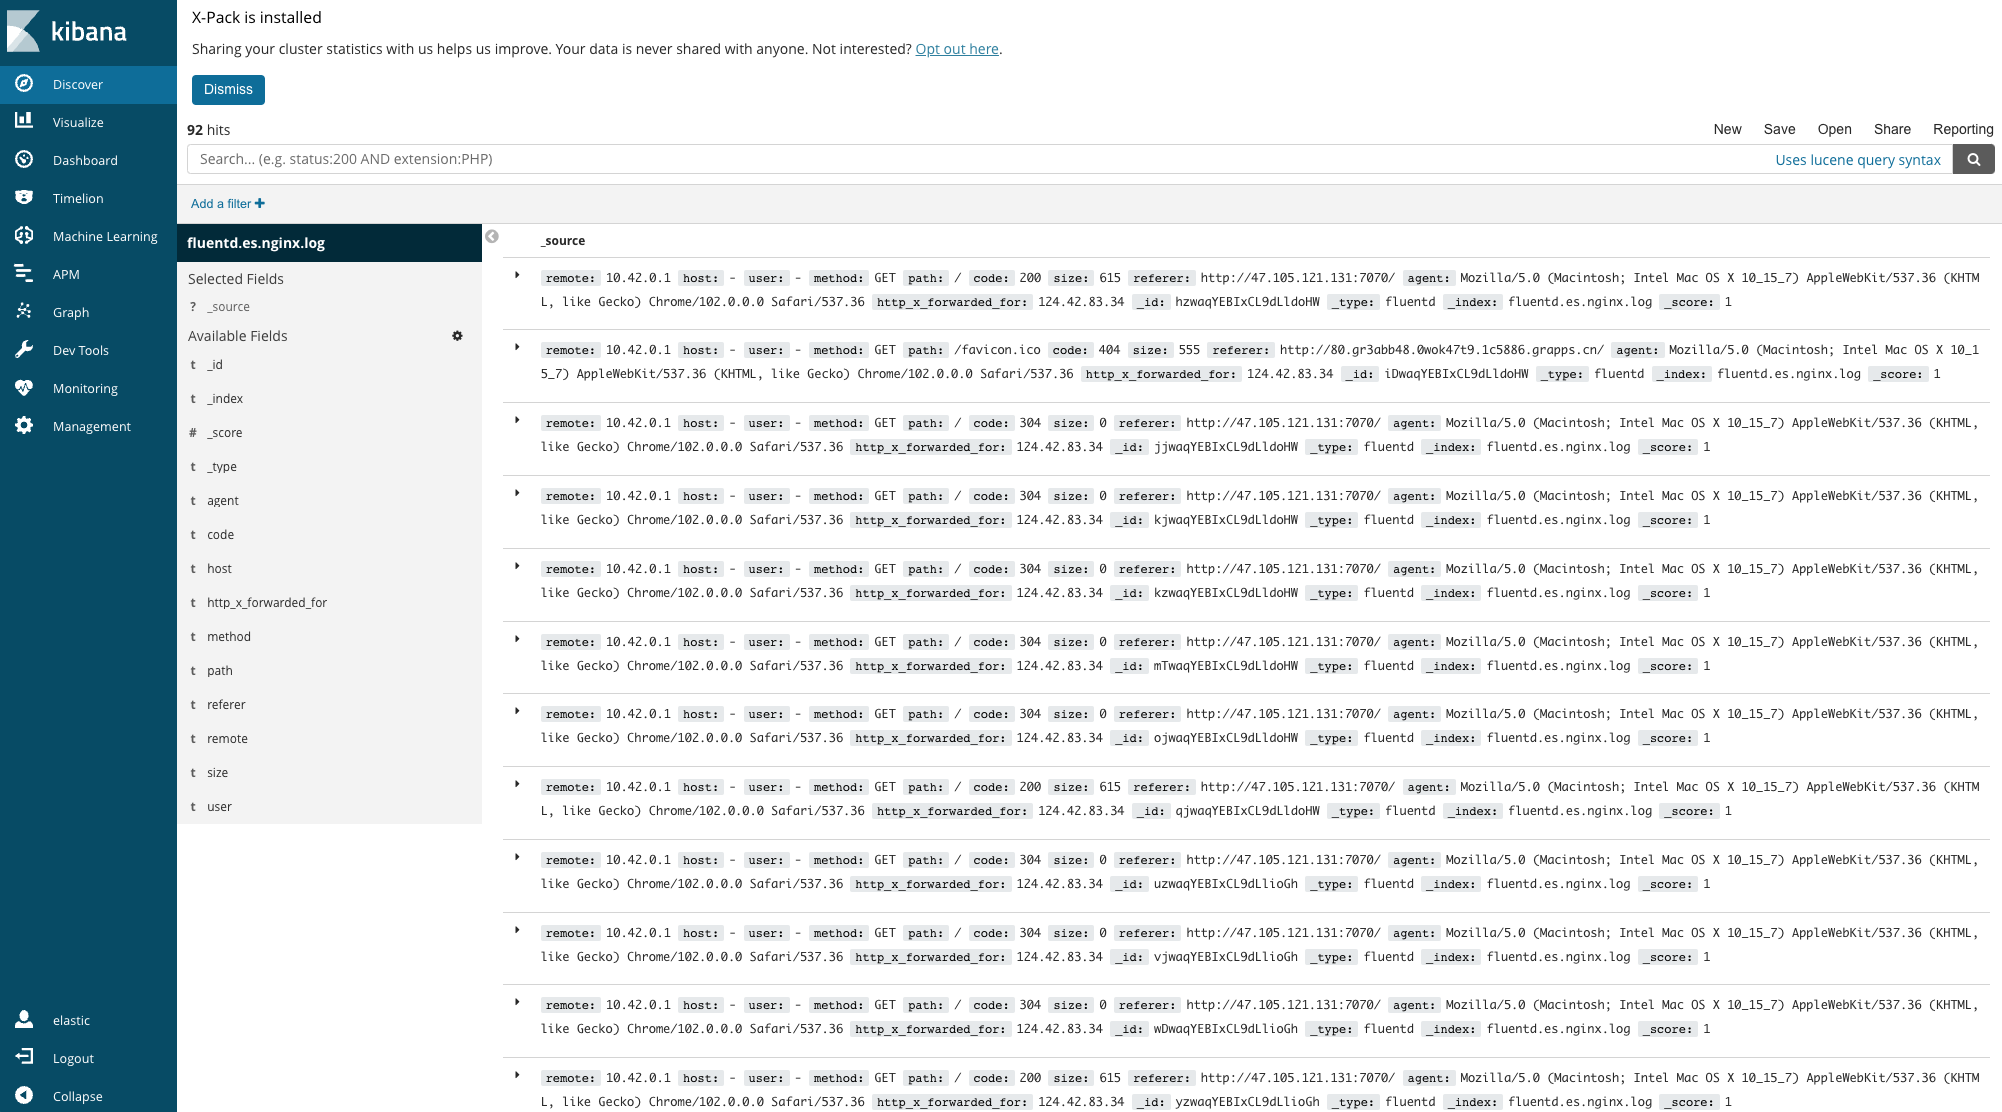
- Access the external port of the Nginx component to generate access logs.
- Enter Kibana -> Management -> Kibana -> Index Patterns, add Index, and enter Discover to view log information.
For detailed tutorials, please refer to👇
Plugin sharing
At present, plugins can only be published with components. Therefore, when the plugin is published, the business components under the application will also be released, but when the plugin is installed from the store, the application will not be installed.Therefore, it is recommended that when publishing, choose a basic component with a smaller image to bind the plug-in for publishing.Such as:Nginx.We will continue to optimize this release process in the future.Reduce unnecessary image pushes.
Application View -> Publish -> Create a new application template -> Check to publish as a plug-in -> Select the component with the plug-in enabled to publish, and confirm the publish.
After the release is complete, please refer to App Store App ListingAfter the release, all community members can install this plugin.

Participate in community contributions
Through the above steps, we have learned how to share plugins. If you are interested in contributing your plugins, you can publish them in the app store at any time.